 Lynden Siding
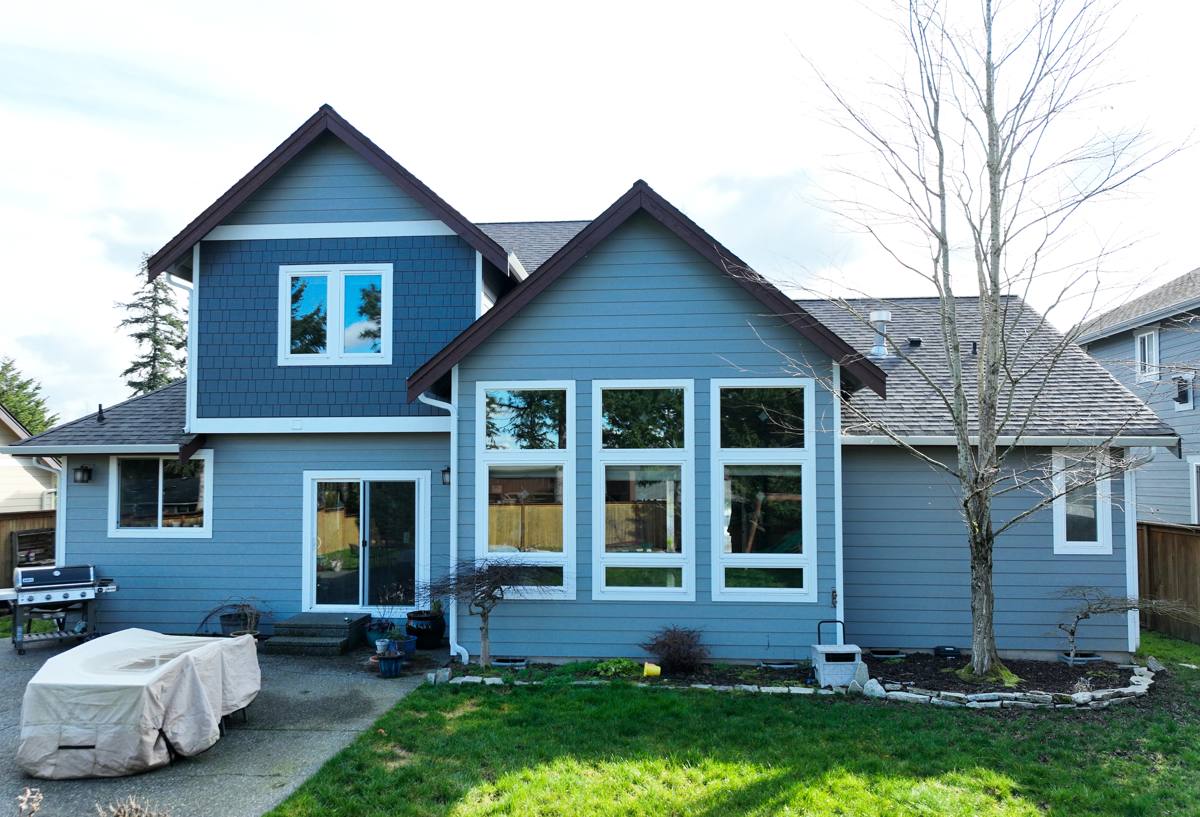
 Siding Installation Built for a Waterfront Address
Birch Bay homes take a beating that most inland Whatcom County houses never see. Sitting right on the water means a steady diet of salt-laden air, wind that drives rain sideways into wall assemblies instead of straight down, and a moss and mildew season that can run nearly year-round on shaded or north-facing elevations. A siding installation here isn't just a cosmetic upgrade — it's the single biggest factor in whether a house stays dry, structurally sound, and low-maintenance for the next few decades or starts showing problems within a handful of years.
This page is specifically about the siding installation itself: what the job needs to include, how we sequence and detail it, and why the difference between an average installation and a correctly built one shows up fastest on a waterfront lot like this. We install James Hardie fiber cement exclusively, and everything below assumes that starting point.
What Birch Bay's Climate Actually Demands From an Installation
Salt Air and Hardware Corrosion
Salt in the air accelerates corrosion on anything metal — fasteners, flashing, trim clips, even the heads of nails if the wrong type gets used. On a typical inland installation, hardware choice is a smaller decision. On a waterfront property like this, it's one of the first things we lock down, because a siding job that looks perfect for a few years but is held together with corroding fasteners underneath is a job that fails from the inside out.
Wind-Driven Rain That Doesn't Fall Straight Down
Waterfront exposure means more wind, and wind pushes rain sideways into siding laps, window and door flashing, and every seam in the wall assembly. A siding system that would perform fine in a sheltered, calm location can still leak here specifically because the water pressure against the wall is coming from an angle the design never accounted for. That changes how we handle laps, flashing overlaps, and drainage behind the panels.
A Moss Season That Doesn't Really End
Mild temperatures, shade, and near-constant surface moisture add up to a long moss and mildew season across this part of Whatcom County, and Birch Bay's proximity to the water only extends it. Shaded walls and anything tucked under tree cover need siding and installation details that don't trap moisture against the substrate, or you end up with organic growth working its way into seams and fastener holes over time.
The Material We Start Every Job With
We install James Hardie fiber cement siding exclusively — not vinyl, not LP SmartSide, not Cemplank, Allura, primed spruce, or cedar. That's a professional standard, not a sales pitch. Fiber cement has a non-combustible core, holds a factory-applied ColorPlus finish that resists fading and chalking far better than field-applied paint, and Hardie's HZ5 product line is engineered specifically for regions with heavy moisture exposure. On a lot exposed to salt air and driving rain the way Birch Bay is, that combination of dimensional stability and factory-cured finish matters more than it would on a sheltered inland property. But the best material in the world only performs as well as the installation behind it, which is the part most homeowners never get to see once the job is finished.
What a Correct Installation Actually Involves
Sheathing and Moisture Barrier Prep
Before a single piece of siding goes up, the sheathing underneath gets inspected for rot, soft spots, or existing moisture damage — which shows up more often on waterfront homes than people expect, especially on walls that have been fighting wind-driven rain for years. Any damaged sheathing gets replaced, not sided over. A weather-resistive barrier goes on next, lapped correctly from the bottom up so water is always shed downward and outward, never trapped behind a reverse lap.
Flashing and Water Management
Flashing at windows, doors, roof-to-wall transitions, and any wall penetration is where most siding failures actually start, not in the field of the wall itself. On a house taking wind-driven rain from the water, we treat flashing sequencing as non-negotiable: every layer overlaps the one below it so water always has a path down and out, never a place to pool or wick inward.
Fastening and Panel Installation to Spec
Hardie fiber cement has a published fastening schedule — fastener type, spacing, and penetration depth — and it exists because deviating from it is exactly how you get panel cracking, blow-through, or premature loosening. We use corrosion-resistant fasteners rated for this kind of coastal exposure rather than whatever's cheapest, and we keep panels held well clear of grade, roof lines, and hardscaping so the bottom edge isn't sitting in standing moisture.
Trim, Joints, and Finish Details
Butt joints, corners, and trim transitions are where a job either stays tight for decades or starts opening up within a few wet seasons. We favor factory-finished edges and properly engineered joint details over relying on field-applied caulk as the primary defense, because caulk is the first thing salt air and constant moisture cycling break down.
| Detail | Standard Inland Approach | What We Do on Waterfront Birch Bay Homes |
|---|---|---|
| Fasteners | Standard-grade nails or staples | Corrosion-resistant fasteners matched to Hardie's coastal exposure guidance |
| Flashing sequencing | Basic overlap at penetrations | Full shingle-lap sequencing at every window, door, and wall transition |
| Clearance from grade/roof | Minimum code clearance | Generous clearance plus attention to hardscaping and planting beds that hold moisture against the wall |
| Joint treatment | Field-caulked butt joints | Factory-finished edges and engineered joint details wherever the layout allows it |
| Drainage behind panels | Direct-applied, no gap | Drainage plane detailing on exposures that see sustained wind-driven rain |
Our Siding Installation Process, Step by Step
- On-site assessment: We walk the exterior, check existing siding and trim condition, and identify which elevations take the most wind and moisture exposure.
- Tear-off and sheathing inspection: Old siding comes off and the sheathing underneath gets inspected before anything new goes on — this is when hidden moisture damage gets found and dealt with, not covered up.
- Weather-resistive barrier installation: A properly lapped moisture barrier goes over the sheathing, sequenced so water always drains down and out.
- Flashing at all penetrations: Windows, doors, roof-to-wall transitions, and any penetrations get flashed before siding installation starts, not patched around afterward.
- James Hardie panel installation to spec: Panels go up following Hardie's published fastening schedule, clearances, and joint details.
- Trim, corners, and finish work: Corner boards, trim, and joint treatments are finished with an eye toward minimizing long-term reliance on field-applied caulk.
- Final walkthrough: We review the finished job with the homeowner and point out anything worth knowing for future maintenance.
What Affects the Cost of a Birch Bay Siding Installation
We don't publish a per-square-foot number because it genuinely depends on the house, but these are the factors that move a quote up or down on a project like this:
| Factor | Why It Matters |
|---|---|
| Home size and number of stories | More surface area and more complex staging on multi-story homes both add labor time |
| Condition of existing sheathing | Hidden moisture or rot found during tear-off has to be repaired before new siding goes on |
| Roofline and trim complexity | More corners, dormers, and transitions mean more flashing and joint detail work |
| Wind and water exposure of the lot | More exposed waterfront elevations warrant more thorough flashing and drainage detailing |
| Site access | Tight lots, slopes, or limited staging area near the water can add setup time |
Why Hiring a Crew That Already Works in Birch Bay Matters
A siding installer who mostly works inland can still do a competent job on a calm, sheltered house. That same crew, unfamiliar with what a waterfront wall assembly actually deals with, is more likely to treat flashing, fastener selection, and drainage detailing as optional upgrades rather than baseline requirements. Crews that regularly work this specific stretch of coastline have already seen what wind-driven rain and long-term salt exposure do to siding installed without those details — usually because they've been called back to repair it. That firsthand pattern recognition is hard to replicate from a spec sheet alone, and it's the difference between a crew that follows a checklist and one that knows why the checklist exists.
Signs Your Current Siding Isn't Holding Up
- Soft, spongy, or discolored spots on the siding surface, especially near the bottom edge or around window trim
- Visible gaps opening up at butt joints, corners, or trim intersections
- Persistent moss or dark streaking that keeps returning shortly after cleaning
- Paint or finish that's chalking, peeling, or fading unevenly, particularly on shaded or water-facing walls
- Rust staining running down from fasteners, trim, or flashing
- Any bubbling, warping, or separation where siding meets a window, door, or roofline
If you're planning a siding installation for a Birch Bay home, or you're seeing any of the signs above on your current siding, we're happy to take a look and give you a straightforward, no-pressure estimate — just fill out the form below.